So you bought a Wacom Intuos tablet and hey, the wireless mouse that comes with it is quite alright! It even has a scroll wheel. To bad that it is so hard to rotate. Every time you use it, you press the scroll wheel button, whether you like it or not. This annoyed me so much that I decided to try to adjust it. Now it works just fine. You can hack your Wacom mouse too and fix all kinds of mouse trouble:
What you need to make it rotate more smoothly
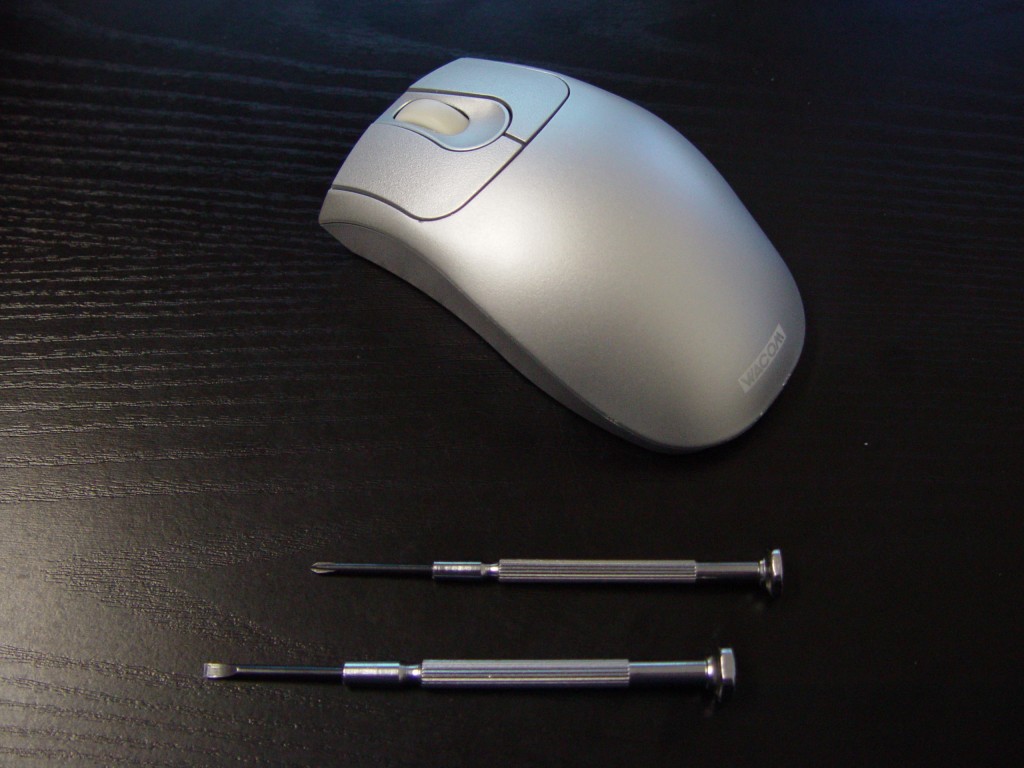
- a 2.4 mm philips screwdriver
- a 3 mm flat screwdriver
- and of course the mouse. This one comes with the Wacom Intuos 2 set, but this how-to will work with the majority of scroll wheel mouses.
How it’s done
 First unscrew the mouse. Usually there are one to four screws, hidden under a sticker. This Wacom Intuos2 mouse for example has three. Later models, like the Wacom Intuos3 are very alike. Since the complete bottom of this mouse is stickered, we can just peel of a corner to reach the first screw. Use your nail or a flat screwdriver to get under it, then just pull. Do the same with the other corner.
 In this case there are three screws, the last one is in the center, beneath the sticker. Unscrew all.
 Now we can easily lift of the upper half of the casing. Mention the thick, metal ring. It isn’t connected to the circuit board, and no, it’s not magnetic either. It’s only there to give some weight to it, so it feels more solid!
 If you, like me, prefer a light mouse above fooling yourself something is better when it’s heavy, unscrew it and leave it out.
 To the left of the scroll wheel, there is a little metal strip where the axis of the scroll wheel presses on when you press the wheel. Then the strip presses the actual switch. Sometimes you can bend it away from the switch, just a bit. That way, it will get more resistance and it will be harder to click the switch. Always be very carefull, not to break it or overbend it. You’d have to make a new one by hand and it’s not always easy to get fit if you can pull it of at all! In this case it didn’t help much though, so I had to go further:
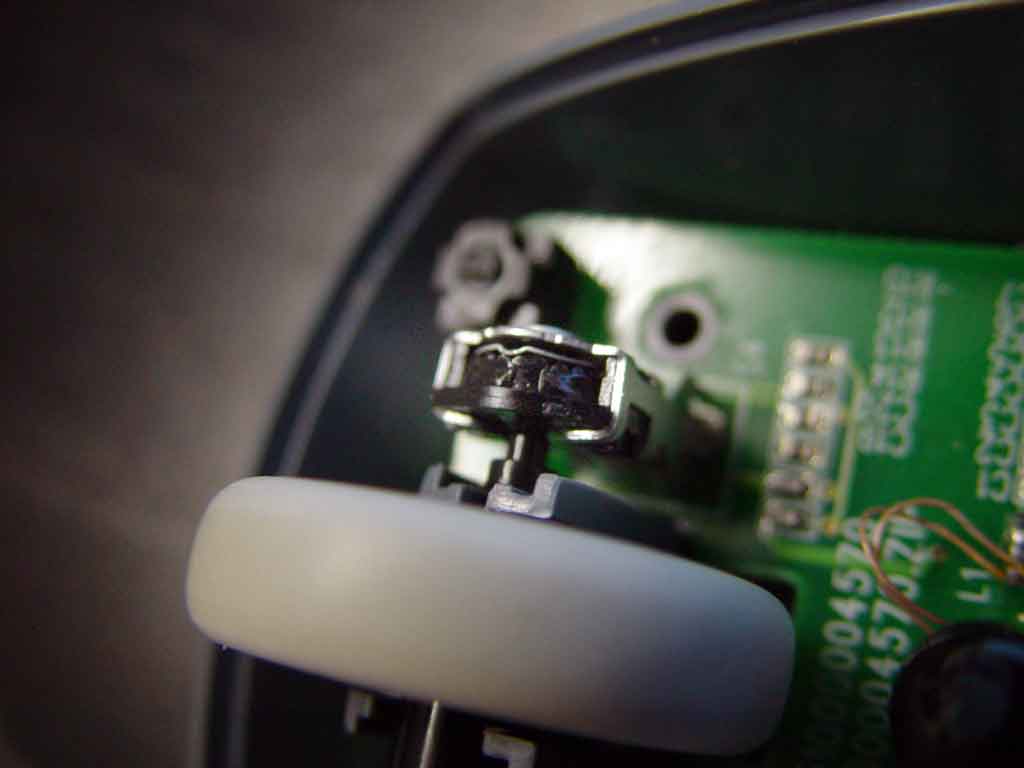
 The right end of the scroll wheel axis is attached to a little mechanism that gives the wheel resistance when you try to scoll.
 Here a close-up. The little dent in the litte metal disc (red) makes it hard for the axis (green) to rotate. Of course, the metal disc is only very thin and quite easy to deform.
 Just put a flat screwdriver between the ‘red’ disc and the ‘green’ axis and the pressure will flatten the dent some. Be careful not to overdo it. Pull out the screwdriver and try the scroll wheel to feel if it needs more adjusting. If it does, put in the screwdriver again and gently push a little in the directing of the dent. Check the scroll wheel again. Repeat untill the desired ‘smoothness’ is reached. It should run much smoother now.
- Put back the top half, screws and sticker corners – Fixed!
Tips and tricks on cleaning your Wacom mouse
Cleaning the outside
After a while, the cloth sticker on the bottom of the mouse collects so much dust, grease and dirt that it makes it harder to move your mouse than is comfortable. I tried to clean it, but found out that there is a much better solution: Just tear it off! Unlike the view at photo #3, make sure you keep the transparant plastic sticker underneath it though. After removing it, the mouse has virtually no resistance to the surface any more! 🙂 Also, it’s very easy to keep both the mouse and Wacom tablet clean. It gathers some grease from my hands sooner or later. When it does, I do rub it to my jeans or clean it with some kitchen paper or even toilet paper.
Optionally, you can even wax it. I know it sounds funny but it helps keeping it smooth longer. I used plain old Turtle Wax but of course any car wax will do. If you use wax, use it on the Wacom tablet as well, for the minimum resistance and maximum endurance.
Cleaning the inside
On the inside of the Wacom mouse, dust and dirt can clog up. Like with just about mice that have scrollwheels and multiple buttons, dirt can get it. And it will. So if:
- If the mouse buttons start to behave irregular
- If it double clicks when you single click
- If it doesn’t always work when you click
- If scrolling becomes irregular or unsmoothly
…then you might want to open up the mouse as described above and clean it out, instead of throwing it out!

Of course, if nothing helps, you can always still buy a Wacom Intuos3 Five-button Mouse – mouse ( ZC100 ) or Intuos4 5 button mouse
online.
Slipping Scroll Wheel
Another problem that some have reported is a loose scrolling wheel. The rubber wheel slips, making it look like the wheel is defective. The solution is to open it up like described above and add a drop of glue to the rubber wheel while you press it aside.
Detached Scroll Wheel
Jakoba Havinga wrote: It can occur that that the scroll wheel slips because the wheel kan slip too far to the left. The small wheel next to looses grip and the scroll wheel is detached. You’ll notice that there is no resistance, while if you open the mouse and press the wheel to the right, the scrolling works fine. Unfortunately, the wheel doesn’t stay in place.
The detached scroll wheel fix
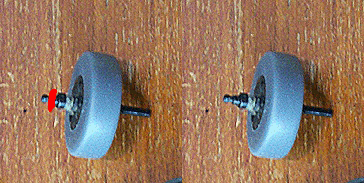
 Get the scroll wheel completely out, by carefully lifting the circuit board. Wind a very small orthodontic elastic band
 around the axis. A drop of glue will probably do the trick, but make sure you stay away from the tip.
Links
- Lloyd Sommerer made a page about repairing an Apple Pro Mouse.
- Byron Gracey has a well documented page on Repairing your Apple Pro Keyboard (and also how to avoid needing repairs).
- Harald van Arkel has a set of pages with very detailed photos and descriptions of the inside of an Apple Pro Mouse. The photos and descriptions are quite informative.
- Mikael Jacobson wrote a page about how to fix a slipping Wacom mouse scroll wheel.
- I found out this page is mentioned in an article of About.com called Hacking the Wacom Mouse. You might want to read it for the poll on how people use their input devices or for the reactions.
If you have any additions or comments too, don’t hesitate to drop me a line at solutions@beeldbuijs.nl or add them here.


I loved this so much I translated this blog to French! Well, I followed these instructions and took pictures and wrote about it. I liked back to this article because I think credit should be given where it’s due. Plus I was tickled pink to finally fix my Wacom mouse after so many weeks of failed efforts and aggravation. This tutorial is great.
PS: these photos are much nicer than the original post you published. My camera doesn’t do so well with closeups, so my pictures are a bit blurry.
Thanks very much for this article.
On my mouse, I found that the rubber wheel had collected a bunch of oil (skin oil?) between the rubber outside and the plastic hub. I have seen rubber do this on items like this that are handled frequently, for example remote controls. In the Wacom mouse wheel, this oil allowed the rubber to slip on the hub easily, which prevented the rubber from actually turning the inside mechanism.
I carefully removed the wheel from the mouse by lifting the circuit board a little and tilting the wheel up and out. While doing this, I had to BE CAREFUL not to disturb the wires that connect the circuit board to the antenna.
After the wheel was out, I then removed the rubber outside (like a bicycle tire) from the plastic hub, and cleaned them both with mild soap. After reassembly, the rubber no longer slips, and so the wheel works.
Thanks, my scrool wheel was not working for 2 days, happy to get it working now again for many years…
Model CTE 430… Saphire
Thanks for commenting. It makes pages more up-to-date and ranks them higher, so others can find them easier. Also, I recently made it easier to comment on articles. I like to make pages like this one, that help others.